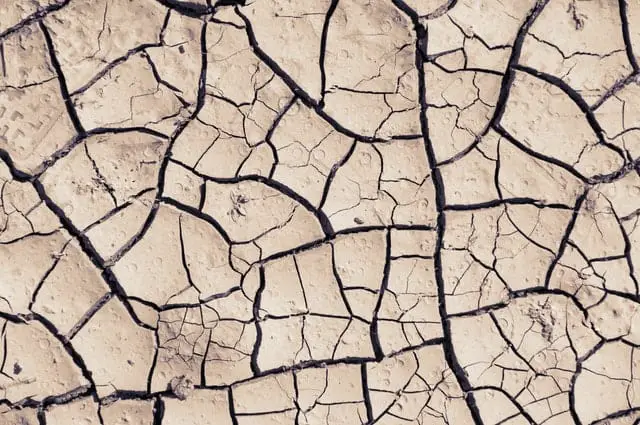
You probably bought a manufactured home out of foreclosure with cracks all over it.
Or maybe your current home has seen better days to a point of requiring an urgent revamp.
Whichever reason it might be, repairing cracks on your home can be a great way of adding value and even adding a few days on the home’s lifespan.
Cracks can be caused by factors far from the natural aging process:
- Uneven expansion and contraction caused by uneven heating
- Use of damp wood in the previous repair work
- Foundation problems
- Flaws at the corners of the windows and doors
- A leaking ceiling
Today, homes are less prone to cracking and similar problems than they were 40 years ago, thanks to the HUD code.
The HUD code outlines specific quality and safety standards with which the makers must comply for every home that rolls out of the assembly line.
Most of the manufactured homes you’d find in America today are most likely made from Drywall, a material that is understandably vulnerable to damages but one that is easy to repair.
This material is prone to cracking when exposed to the causative agents.
Sometimes the damages may be profound enough to pose a safety risk.
This guide is all about fixing any sort of crack on a manufactured home.
Do You Even Need to Hire Professionals?
That’s the first question you will ask yourself.
Whether you will need to hire a professional to do the repair may depend on a few factors.
Ask yourself these questions:
- How much will the professional repair cost you?
- Do you require special knowledge or skills?
- Do you have sufficient time in your hands to complete the repair?
- How much effort is it going to take you to fix the cracks?
The size of the crack and other flaws will influence the decision as well. If you are willing to take on the task, and you have all it takes to repair the problem, there is no good reason for hiring a professional.
Fixing larger and more extensive cracks, however, can be a bit challenging.
As you will see, if the crack or hole is wider, it is prudent to eliminate and replace a few pieces of the drywall.
Overall, this will take significant skill to fix and a whole lot of financial resources.
For example, the cost of hiring a qualified contractor to fix a square foot of Drywall is the range of $40 and $60.
If you were to do it by yourself, you’d spend between $10 to 20 for a panel of Drywall. A small piece will cost you around $5. As you can see, it is cheaper to go alone.
Joint Compound versus Putty
Before we even look at the different methods of fixing the cracks on a mobile home, let’s take a glance at the repair materials.
Most repair jobs will need you to use a specific type of filler.
There are two most commonly used filers –
- putty
- joint compound.
The joint compound is normally made from a mixture of water and gypsum dust.
Putty can be made from anything the fabricator thinks is fast-sticking and durable, but it’s often made from platinum catalysts, a few plasticizers, and hydrogen polysiloxanes.
If your walls have seams on them (they most likely have them), the joint compound would be the perfect material for sealing.
So, you will need a bucket of drywall mud when working close or on seams. Putty, on another hand, is almost exclusively used to fix gaps – just smear it into the gaps and let it dry.
Joint compounds, however, come with one flaw – it takes overly long to dry.
It may also shrink considerably during the drying process. However, it is the easiest repair material to even out.
Putty dries faster than the joint compound, but it is harder to work with because of the tendency to get thicker and hard during the repair project.
The best trick is to combine these two.
Guide To Fixing Cracks – 3 Scenarios
Here is how to fix cracks on your manufactured home:
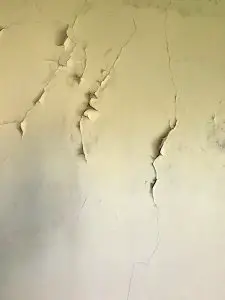
Scenario #1: How to Patch a Crack
Drywall cracks occur along the seams more often than any other region.
Because the seam is a region where two walls meet, it’s bound to happen.
This type of cracks is caused by a range of stress factors including wide temperature fluctuations (when you abandon or heat your home irregularly in the winter) and undue pressure in the joints.
Essential supplies
Get yourself these materials and tools when fixing a crack along the seams:
- Drywall tape
- Joint compound
- Primer
- Sandpaper
- Paint that matches your walls
- Paintbrush
- Damp cloth
- Spatula or putty knife
Procedure
Assess the damaged area
Inspect the cracked area to figure out how to repair it. Larger cracks will require an approach different from that used for smaller cracks.
Tape the crack
Consider taping the crack if it is extensive. Also, if you think the crevice might widen further, cover it with a tight tape.
Taping is not necessary when dealing with small cracks. Hairline and thin cracks can be left untapped as well.
Fill the crack
If you used tape in the above step to hold the cracked parts in place, it would be prudent to use a joint compound. Proceed to smear the joint compound mud over the gap repeatedly until the gap is filled. You want to ensure that the repaired surface is even.
NOTE that the joint compound dries faster and is more manageable if you apply it in thin coats; larger smears will take longer to dry and give you a hard time applying into the fine cracks.
If you are dealing with thin cracks, it is prudent that you use putty. Break a tiny piece, push it into the crack, and level it to fill the space.
Sand it down
Let the filler dry for some time. The joint compound takes about 24 hours to dry, but this may depend on the humidity and temperature. Cold and humid air means the material will take longer to dry.
Spackling putty takes just 2 hours slightly more to feel dry. The perfect drying time should be 4 hours.
Grab your sandpaper (preferably the fine-grit sort) and scrub the surface until smooth.
Paint the surface
One day after filling the crack with putty or joint compound, add the primer on the surface and allow it to dry. Complete the repair by painting the surface. (NOTE that the primer always comes before the painting job).
Scenario #2: Filling A Small Crack or Hole
Whenever there is a need to hang a picture on the wall or something, you often get the temptation of boring a hole in the wall or using some glue. Nail holes are some of the top causative agents of damaged walls in mobile homes.
After a period of boring these halls on your walls, they will take a toll, requiring lengthy and costly repair work. The trick is to use glue or some form of an adhesive compound to stick decorations on walls.
Tools and supplies
- Fine-grit sandpaper
- Scraper
- Damp cloth
- Paintbrush
- Joint compound or putty
- Paint that matches your walls
- Primer
- Spatula or putty knife
Put everything you need together before getting started.
Start by dealing with the loose edges
When boring into drywall, you’ll notice some loose edges with a tendency to stick up.
Remove these parts if you haven’t removed them yet. Scrape the edges off using a scraper.
If possible, consider pushing them back into the gap so that they can serve as a filler.
Fill the hole
Take your putty and break one tiny piece and apply it into the hole.
Repeat this several times until the hole is filled up. The putty performs well for this task.
Otherwise, you can choose to use a joint compound.
Sand it down
Read the putty’s instructions regarding the time it should take to dry. Once it’s dry, sand the surface using fine-grit sandpaper.
Paint the surface
What is left here is to add a layer of finish.
Wipe the surface with your damp cloth and remove any hanging debris and dust.
Start by applying the primer to the repaired surface.
Once dry, proceed to paint it with paint that matches the color of your walls.
Scenario #3: Repairing A Larger Hole
The amount of work required increases with the size of the damaged area.
Because the hole is large, you will follow a different procedure involving the replacement of some sections.
Tools and supplies
- Drywall saw
- Joint compound
- Utility knife
- Paintbrush
- Spatula or putty knife
- Ruler
- Piece of drywall
- Paint that matches your wall
- Panel adhesive
- Primer
- Backer board
- Nails
- Pencil
- Prybar (optional)
Prepare the surface
Before embarking on the repair work, clean the edges of the surface by scrubbing or washing it with a damp cloth.
You will need to measure a perfect rectangle around the area around the damaged area then, with a pencil, draw it out.
If the hole is too big, consider removing the entire affected panel.
Remove the damaged part
You drew a rectangular outline around the damaged area in the step above.
Use the utility knife or saw to cut out the outlined section.
Otherwise, if you planned to eliminate the battens on the seams where two or more sections joined, use the pry bar to dislodge or loosen it.
Ensure that you have removed all riveting and nails that were left.
Install your new drywall
If the area needs a small replacement piece, consider installing the backer board.
Use a piece several inches bigger than the hole area to prevent the hole from extending outwards with further stress or whatever that might have caused it.
Secure it with a sufficient number of screws to ensure it is held in position firmly.
Cut a fresh drywall patch just the right size to fit perfectly into the wall. Screw it in place.
Otherwise, to cover the place with an entirely new panel, consider applying your adhesive material to the studs.
Secure the panel at the seams and wall studs with nails. After this step, install the new batten strips.
Does the part you removed extend all the way to the ceiling or floor? If it does, consider replacing the trim too.
Seal the joints
It is important to note that this step will be repeated later.
So, apply a thin layer of joint compound on all the seams.
Sand it
Let the mud dry for about 24 hours.
Test whether it is dry and smoothen the surface with fine-grit sandpaper.
Repeat
As we said in step 4, you’ll need to coat the seams multiple times.
Why?
It’s because the surface needs to remain completely smooth to the end.
Repeat this process until the surface is uniformly covered like other panels.
Paint
After the above step, first, apply the primer on the surface and then finish by applying a fresh layer of paint that matches your walls.
Six Ways To Prevent Cracks in Manufactured Home
Settling can be unsettling.
It is better to prevent cracks than embarking on repair work after they have occurred. Here is how to prevent cracks from forming in your home:
1. Inspect your home often
Sometimes identifying a crack in early stages and nipping it in the bud can help avert a costly repair work had it been allowed to spread far and wide.
Problem is, most homeowners rarely take time to walk around the home to spot problems if there are any.
Some of the problems often reported in mobile homes can worsen and create other problems when corrected on time.
If the masonry piers are cracked or chipped, for example, the drywall structure immediately above it may become unstable and crack.
2. Use thick drywall panels
When installing drywall panels, whether you are repairing the home or building it yourself from the ground up, consider using thick panels of drywall. Thin panels of drywall are more prone to cracking than thick ones.
Drywall panels used in the interior are normally 1/2″ inch in thickness.
But that’s when the studs are placed 16” on the center. If the studs of the wall are placed 24” on the center, you will need drywall panels 5/8” thick.
3. Rid your home from structural problems
If the termites ate off the supporting wood or if got weakened by other factors, the effects will be visible on the wall before they are felt anywhere else.
A sunk or shifted foundation produces diagonal or jagged cracks on the walls.
Repairing cracks emanating from structural problems is hard because the foundation needs to be repaired first before moving to the wall.
Related: How Can You Tell If A Manufactured Home Has Become Unlevel?
4. Identify leaks and seal them immediately
Leaking water from the roof or leaky attics may run down your wall’s framing and end up saturating the drywall.
The end up product is usually a softened line of the moisture’s path which may end up forming a crack.
These are the easiest cracks to identify and correct in early before the situation worsens.
Discoloration will form along the line first before the crack occurs.
Very recent leaks can be identified by touching the touching – if the wall feels damp, a leakage is underway.
5. Never leave the home vacant for long
Vacation homes are prone to cracking because owners are seldom there.
If a manufactured home is left empty for a long time, the drywall and hardwood parts tend to succumb to the insults of nature, ending up in cracks and other destruction.
The only reason why abandoned homes cracks faster is the lack of climate control.
The wide fluctuation in humidity and temperature causes the drywall and framing members to contract and expand, resulting in cracking.
Cracks created this way are easy to repair when discovered early – just tape them when they are still small. If you leave your home unoccupied longer, however, you will need to do some significant repair work.
6. Check The Hairline Cracks Over Windows And Doors
Homes of any age and construction tend to shift and move subtly with time.
Because the window and door areas are prone to developing some weak points than any other part of the home, these areas often show the first cracks you will ever see on your home no matter how well maintained it is.
Sometimes it has something with how the home was constructed.
The studs are normally erected vertically to extend from the ceiling to the floor.
When it comes to the door and window areas, however, the studs must be cut to accommodate the window or door.
If the junctions are not fit properly, these areas may start producing cracks as early as the home is finished.
Conclusion
Repairing the cracks in your home is a way of adding value and preventing further damage that might render your home unlivable.
You will use two materials: putty and joint compound.
Remember to evaluate the project and determine whether you need professional help or not.