Picture this – you are moving into a new home where the leaving owners have a fully operational dishwasher installed in the kitchen and a washing machine outside somewhere in the garage.
They make it clear that they are taking both those appliances. But, after thinking about it you realize you probably won’t need a dishwasher.
Rather, you plan to put your old washing machine inside and do away with a dishwasher. Do you think it will actually work though?
It only tells you that you don’t really know whether you need new hoses or not.
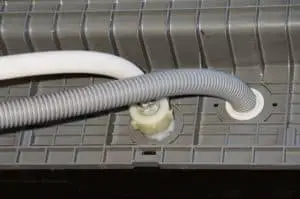
Are dishwashers and washing machine hoses the same? The answer is a straight “yes”. If you ever find yourself compelled to switch between dishwasher connectors and washing machine connectors, don’t fret – both of these machines are designed to use the same connectors and hoses so that you have an easy time using them together.
The first real issue may probably have something to do with compatibility between the fittings and the hoses. The fittings found on your dishwasher hose would need to match the corresponding inlet fittings found on the washing machine.
But for the outlet, virtually all washing machines are designed to empty into the standard drain pipe – no doubts here, although you still should consult your plumber about the subject.
The Three Types of Hoses Used by Dishwashers and Washing Machine
Those two machines use three types of hoses:
1. Reinforced Rubber
This is the standard hose for many washing machines and dishwashers.
They are made from reinforced rubber and if you compare it to other types, it comes out relatively cheap. They are also the easiest to find – just drop in your local dealer store and you’ll be sure to get one.
The best thing about the reinforced rubber hose is highly durable.
It is less likely to burst under high water pressures and water hammers (that sudden “shock” you observe in pipes when the washing machine stops the flow abruptly), thanks to the braided polyester mesh and rayon construction that further strengthens the rubber.
The downside of these hoses is that they are not particularly good for an indoor-based washing machine as they are prone to bursting in indoor environments.
So, only consider them if your washing machine is installed in the garage or outdoor environments. If you still need rubber hoses for your indoor washing machine, you can choose the non-reinforced version.
2. Steel Braided
If you don’t prefer the reinforced rubber type of hoses, you can opt for the steel braided option which is the least you can go as far as outdoor installation is concerned.
Pricewise, they lie somewhere between the costliest and the cheapest options you will find in the store.
If you consider the advantage they have over the rubber-based hoses, they are worth every extra penny you will pay for it.
The stainless-steel braided option encases a hardened rubber hose that guarantees the burst-resistant you need.
The biggest advantage of this washing machine hose has a much lower failure rate compared to rubber hoses but you need to install them in the right way.
Please note that in tight or cramped spaces, this type of hose mat becomes kinked or bent resulting in the sharpened steel braids poking the rubber structure and causing leakages.
To avert this problem, choose hoses that come with an elbow on the tip.
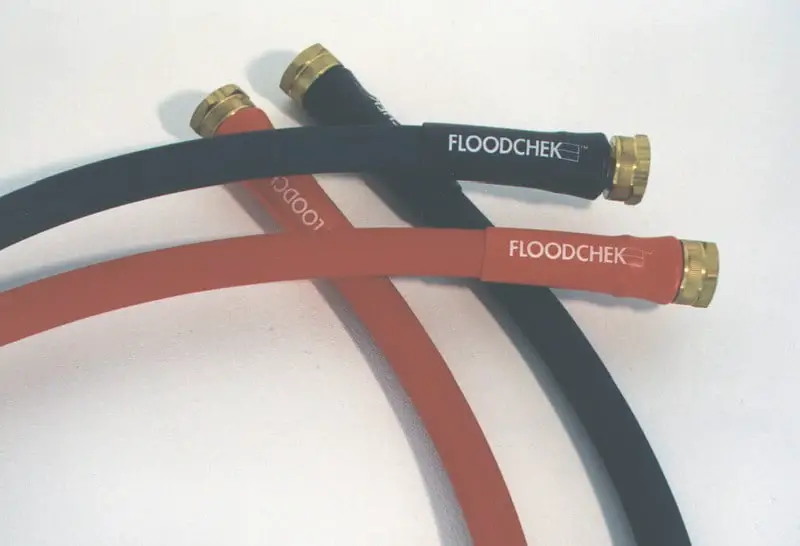
3. Auto-shutoff
This is the perfect type of hose to use with washing machines in an indoor setting. They are available at a few more dollars compared to both braided stainless steel and reinforced rubber options.
The best thing about this type of hoses is their shut-off mechanism added at one end for added safety.
In the case of a burst hose, the connector will sense the sudden change in water pressure and stop the flow of water.
The auto-shutoff mechanism can mean the big difference between a mere drip on the floor and extensive flood damage. Expect a variation in warranty and appearances based on the materials of construction and brand.
How To Install A Dishwasher
The project does not require any advanced electrical or plumbing skills.
Installing your dishwasher successfully, however, does require the possession of equipment and know-how, including the dishwasher installation kit with a water line and a 90-degree fitting.
Step 1 – Get Rid of The Old Dishwasher
So, before even beginning to remove the old unit, start by reading the manufacturer’s guide for how to prepare the area and install your dishwasher.
The guide may contain some useful information specific to the new appliance, like additional parts that may be needed to make the model work perfectly.
- Begin by shutting off the power supply to your old dishwasher at the main circuit breaker.
- Proceed to turn off the water line supplies to the dishwasher at the main shut-off valve (mainly found under the sink)
- Using a screwdriver, remove the front part or access panel located near the floor.
- Proceed to disconnect the old equipment’s wiring connections located (often located in the terminal box)
- Then disconnect the old water line from that supplied to the old dishwasher – use an adjustable wrench.
- Now put a shallow bowl under the connection to gather any dripping water that may leak after removing the nut.
- Having disconnected the dishwasher from supply lines, proceed to delink the drain hose off the dishwasher.
- Unscrew the screws from the device’s brackets and anchor it to the bottom of part of the countertop and any adjacent cabinets.
- Proceed to put the drop the piece of cardboard or on the floor in front of the appliance to avoid marring the floor.
- Pull your old dishwasher out then move it out of the area.
- Finish this step by taping the preexisting electrical cable safely to the floor to prevent that from disturbing your activities when the new machine is moved into position
Step 2 – Prepare the Space for the New Dishwasher
Start this step by unpackaging the new dishwasher close to the area installation. Keep cardboard – or use any old piece of cloth – to protect the floor during the entire installation project.
- It will be hard to access the backside with the unit in front of you, so tip the machine onto its back so that you can have easy access to the electrical connections and plumbing
- Remove the access panel
- Attach the 90 degrees elbow fitting from the installation kit onto the dishwasher’s water valve. Make sure to follow the manufacturer’s instructions.
- Your dishwasher installation kit will contain a water supply valve.
- Proceed to disconnect your old supply line off the shut-off valve.
- Then route the new water supply line via the hole/channel between the dishwasher installation location and the sink cabinet.
- Temporarily secure the water supply line safely to the floor using tape to prevent unwanted movements when the new machine is adjusted into place.
- Proceed to attach the water line to the device’s shut-off valve.
- Now it’s time to work on the machine’s drain hose.
- Disconnect your old drain hose away from the garbage disposal unit or sink tail pipe
- Route your new drain hose via the hole between your dishwasher and the sink cabinet.
- Temporarily secure the drain hoses to the floor.
- Proceed to attach the brand-new drain pipe to the disposal or sink tail pipe.
Step 3 – Connect the Water, The Drain, And the Electric Lines
It’s time to unpackage the new machine. Peel off the packages and place the dishwasher close to the installation location. You can keep a cardboard or a piece of cloth to prevent inflicting scratches on the floor.
- Remove the access panel.
- Proceed to attach the elbow fitting (at 90-degree) from the device’s installation kit onto your dishwasher’s water valve – follow the manufacturer’s instructions.
- The installation kit needs to come with a new water supply valve(s)
- Disconnect your old supply line leading from the shut-off valve(s)
- Route your new supply line via the hole between installation location and sink cabinet
- Temporarily secure your new water supply lines to the floor using tape to stop them from moving when the new machine is fitted into place
- Now link the water supply line with the shut-off valves
- Now it’s time to work on the machine’s drain hose.
- Delink your old drain hose with a garbage disposal unit or the sink’s tail pipe
- Route your new drain hose via the hole between your dishwasher and the sink cabinet
- Temporarily secure the new drain hose to the floor
- Complete this part of the installation process by attaching your new drain hose(s) to the disposal or sink’s tail pipe.
- From here, you can proceed to check if the valves are working correctly and whether the unit is fit snuggly in the cabinet. Also, make a test operation to see if the electrical wirings and the hoses are working as expected.
Conclusion
Both the dishwasher and the washing machine uses the same kind of hoses. You will choose between three types of hoses – reinforced rubber, stainless steel braided, and the Auto-shutoff type.
The reinforced rubber hose is the most common type and can be cheaper than the other two.
Unfortunately, if you intend to use them with a washing machine, the machine needs to be installed outdoors.

